Full Disk Access
Jump to navigation
Jump to search
Apple's macOS has very tight security, and they make the security better with each OS release. Recently they made it such that apps are not allowed to access the disk unless they get explicit permission from the user, requiring the below procedure.
kJams requires "Full Disk Access" to function properly because it reads from and writes to your music files. Before you run kJams for the first time, please refer to the screen shots below, and follow these steps:
Step Zero: if you're already running kJams, quit it
For macOS 13 or later
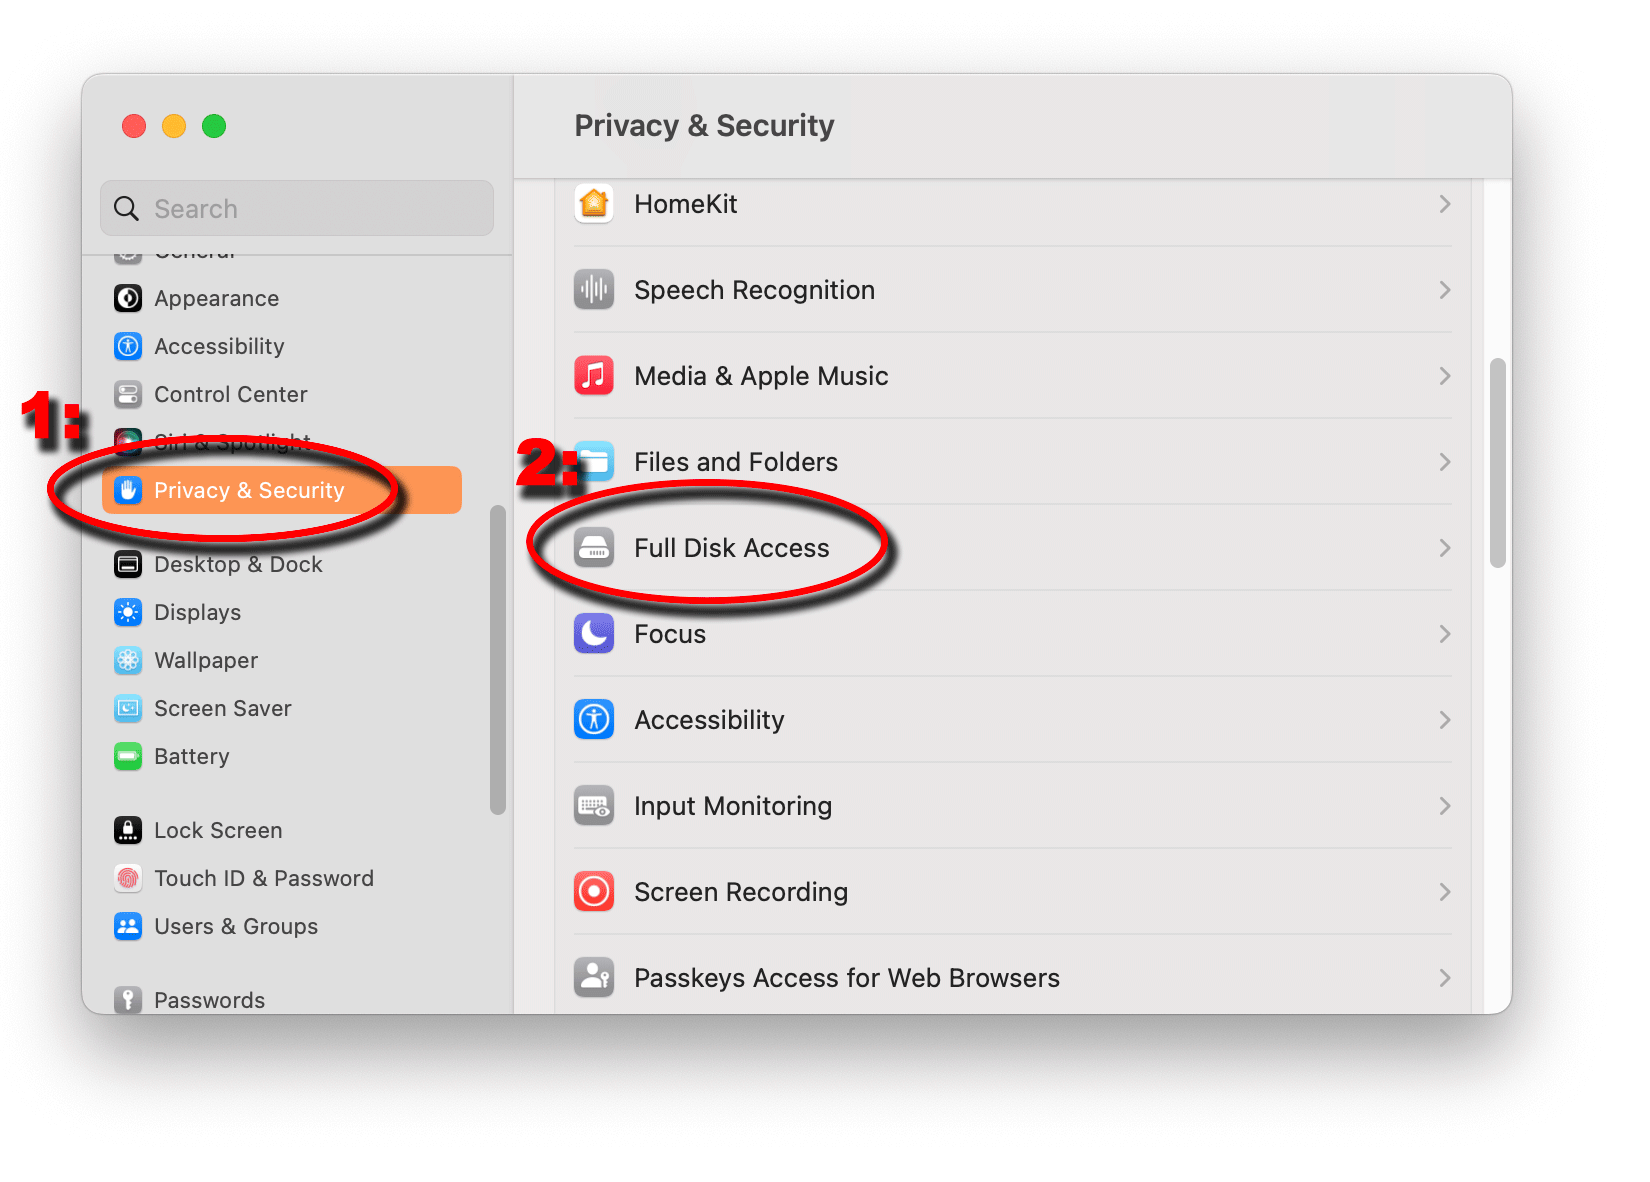
- Go to the Apple Menu and pick "System Preferences" and then select "Privacy & Security"
- In the list on the right, scroll down until you see "Full Disk Access", and select it
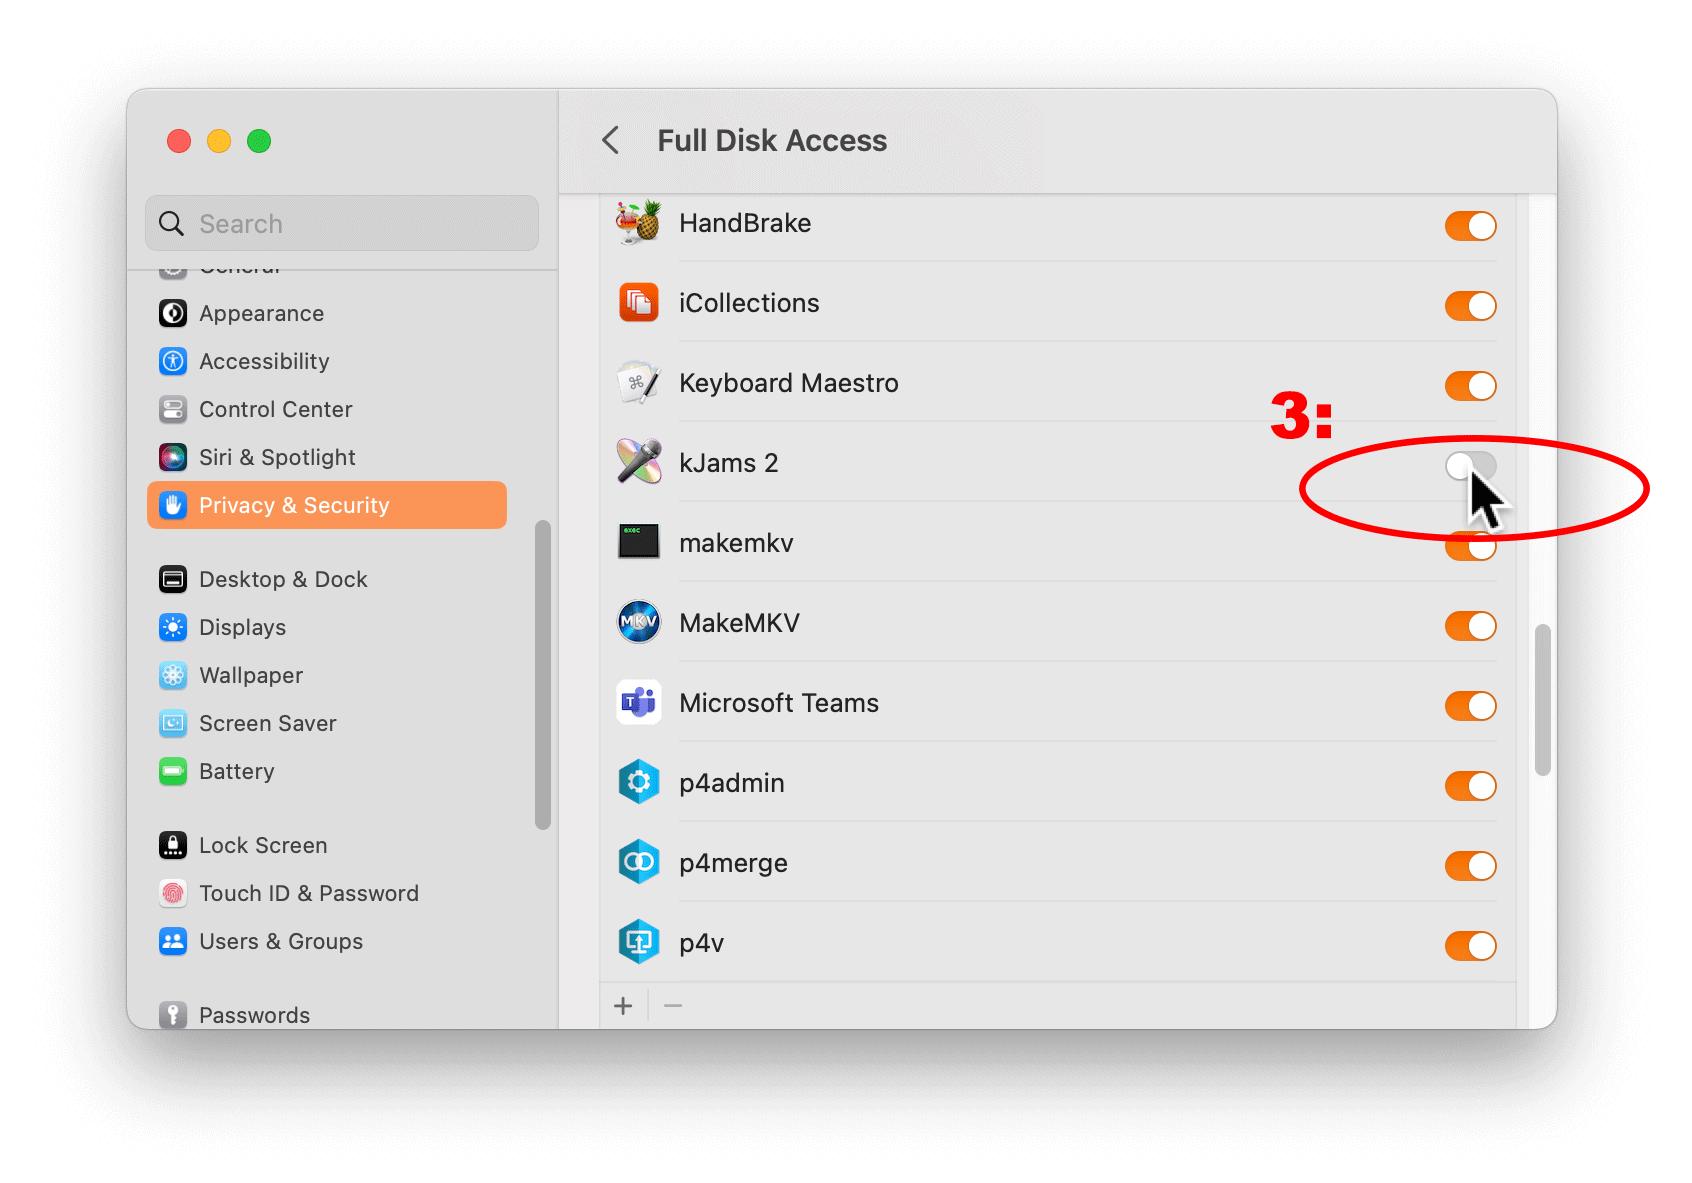
- In the list on the right, if you don't see "kJams" listed, click the "+" button below that list, then find and select the kJams application icon (or you can just drag and drop kJams into that list), then ensure the knob to the right of the kJams icon is in the "on" position
For macOS 12 or earlier
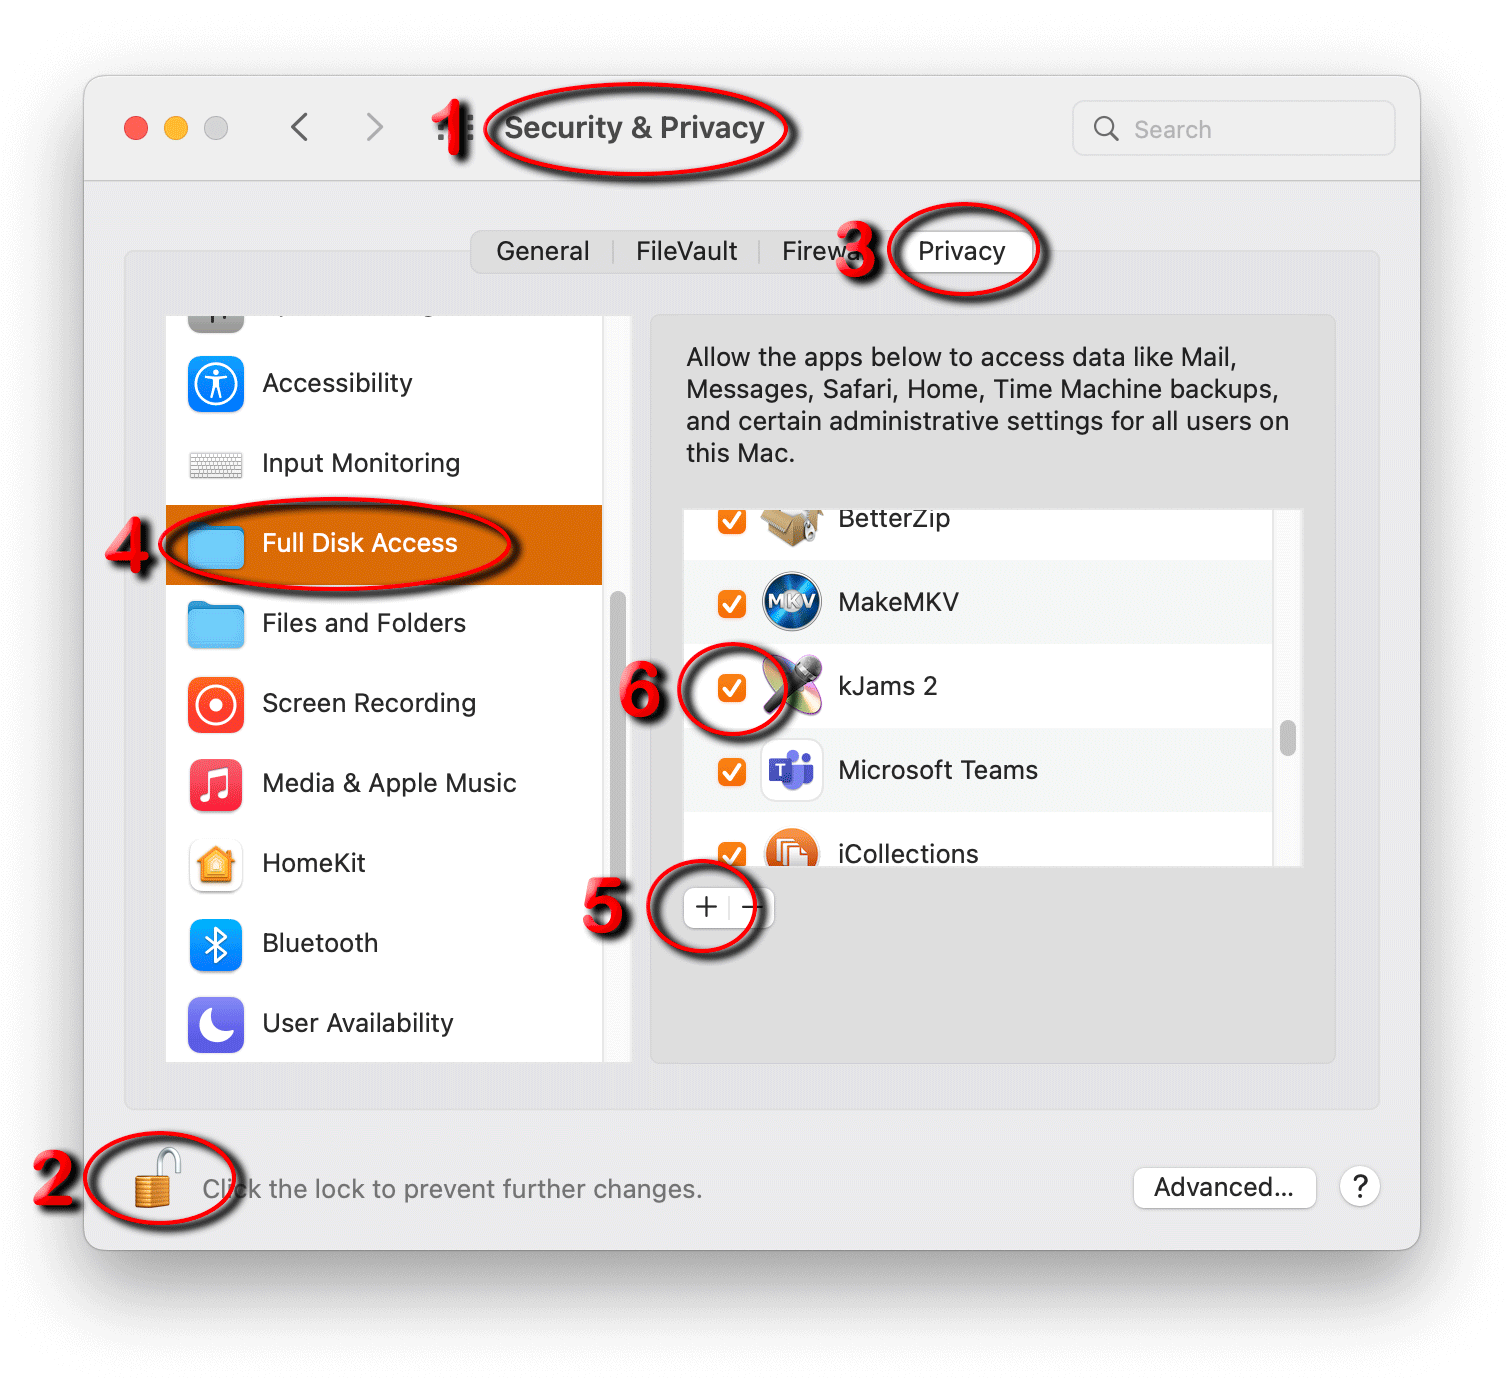
- Go to the Apple Menu and pick "System Preferences" and then select "Security and Privacy"
- Click the little Lock icon in the lower left, then enter your password
- Click the tab (across the top of the window pane) with the title "Privacy"
- In the list on the left, scroll down until you see "Full Disk Access", and select it
- in the list on the right, if you don't see "kJams" listed, click the "+" button below that list, then find and select the kJams application icon (or you can just drag and drop kJams into that list).
- Ensure the checkbox to the left of the kJams icon is checked
- Run kJams again, you will see the warning message again, check the "don't warn me again" checkbox, and you're done!